How to Draw Grapes (Step by Step Guide)
This tutorial shows how to draw a grape bunch and a grape leaf with illustrated step by step line drawing and coloring examples.
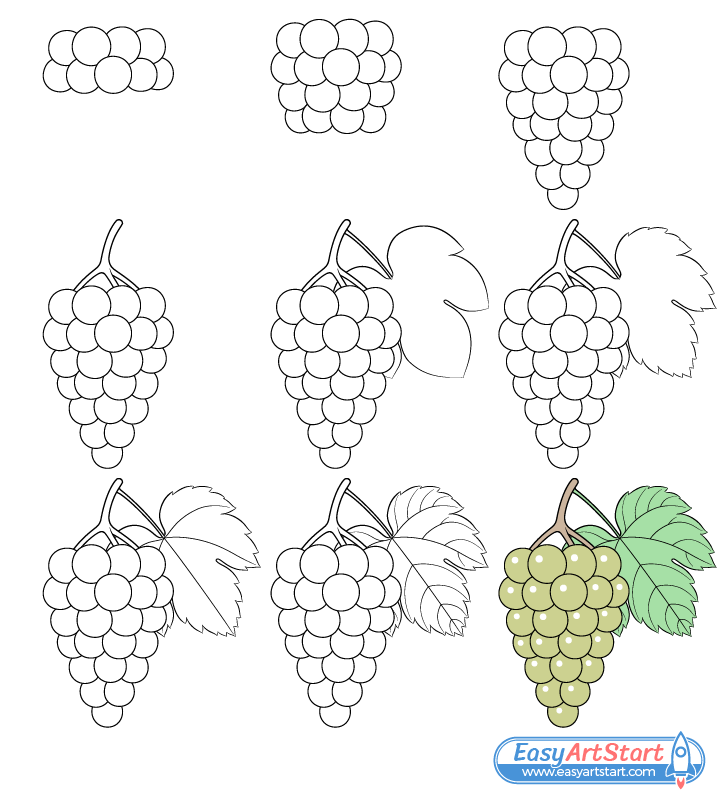
The tutorial consists of nine steps in total and can be split into three mains parts. The first is drawing the grapes, the second is drawing the grape leaf and the their and shortest part is coloring. If you would like to have an easier time you can just draw the grapes and leave the leaf out the leaf (as grape leaves tend to be fairly detailed).
The tutorial also shows how to draw the leaf without the grapes. If you would like to try that instead you can see it’s entire shape with all of the details near the end of step eight.
If you are going to try this guide starting in pencil is recommended. Also, be sure to make light lines, especially if you plan on drawing the leaf as you will need to erase parts of it when doing so. Starting out with light lines is also good practice in general as they are are easier to erase in case you need to correct a mistake.
Darken your lines once you have all parts of the grapes drawn out (before coloring).
Overall, this tutorial is a little longer and more in depth than some other guides here on EasyArtStart. At the same time it’s also not overly complicated and is fairly beginner friendly. Hopefully you find it interesting and easy to follow along.
Step 1 – Draw the Upper Part of the Bunch of Grapes
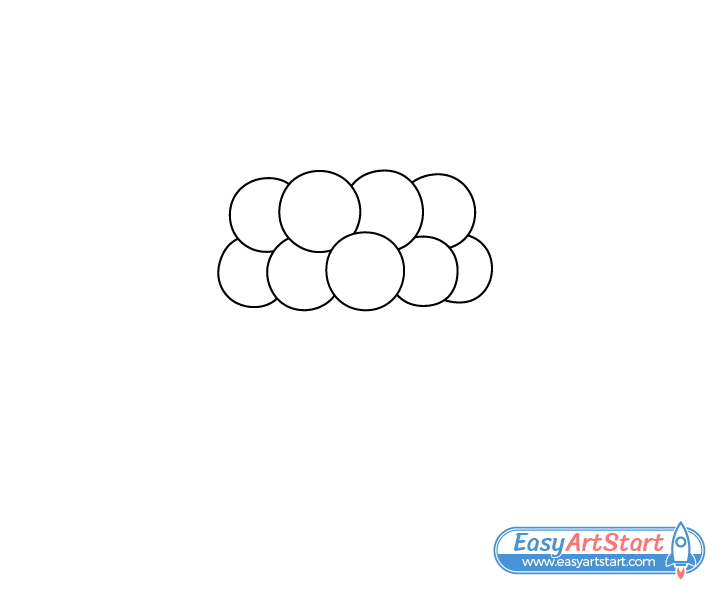
You can add the grapes in rows going top to bottom. Draw the ones that are in the front first and then the ones that are partially hidden behind them. Also, make the top row slightly narrower than the bottom.
It should be noted that bunches of grapes are generally not this will organized. However, the example is slightly stylized so the grapes can be a little more “orderly”.
Step 2 – Draw the Middle Grapes
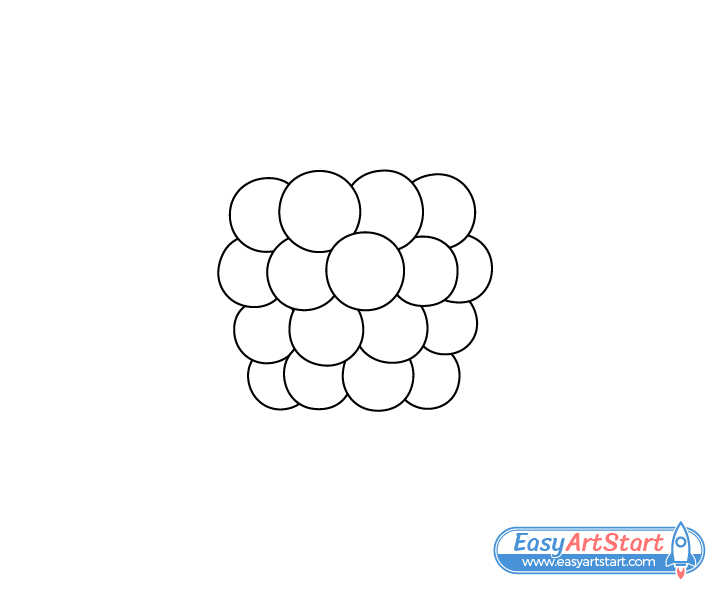
Add the next two grape rows below the previous set. Draw each row to be narrower than the one above it and where it’s upper end is partially hidden by that row.
Step 3 – Finish the Grape Bunch Drawing
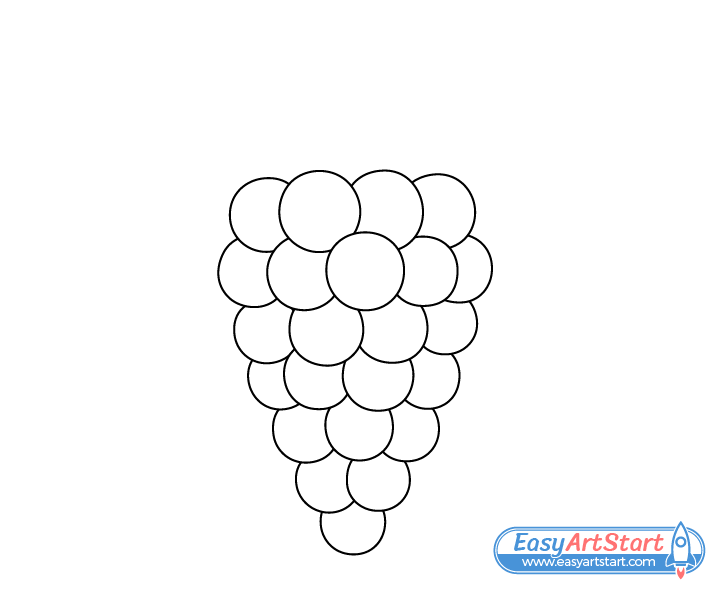
Finally, draw the bottom part of the bunch with three grapes in it’s upper row, two below that and one at it’s bottom tip. You should have an outline of the entire grape bunch similar to the above example once done.
For another tutorial that uses a similar drawing approach see:
How to Draw a Raspberry in 8 Steps
Step 4 – Draw the Stem
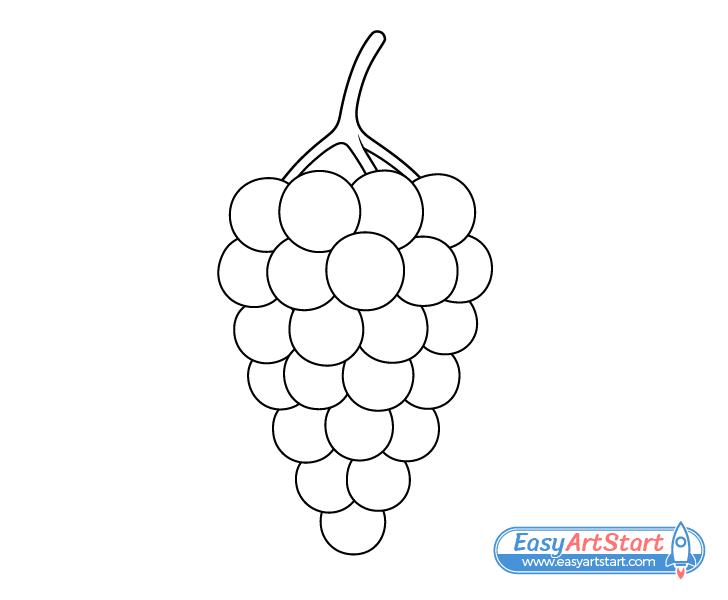
On top of the grape bunch add the stem. This should branch out into several slightly thinner sections as it goes down. Also, draw each part of the stem with a slight curve so that it looks more natural.
Step 5 – Outline the Grape Leaf
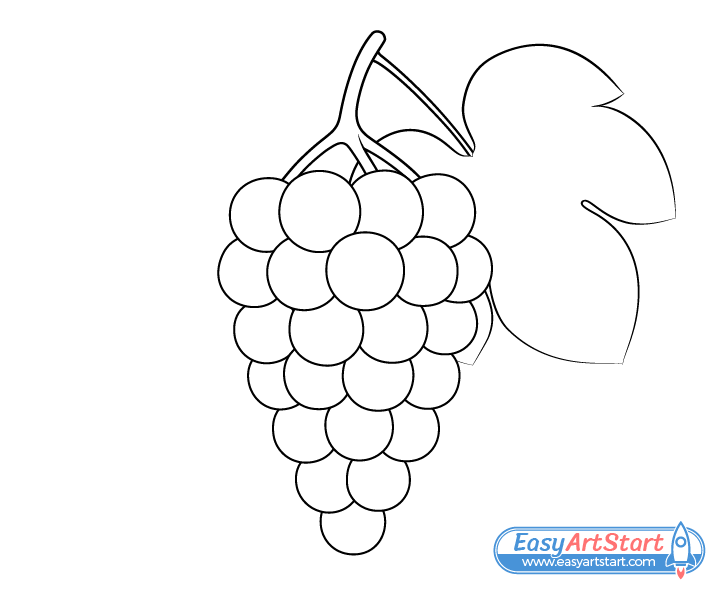
As already mentioned at the start of the tutorial, a grape leaf is fairly detailed so if you want to have a simpler drawing you can leave it out.
If you do wish to draw the leaf start by outlining it’s main shape without any of the small details such as the veins or the “teeth” around it’s edge. You can see an example of what this looks like in the image above. However, unlike the example be sure to make the outline very light so it’s barely visible.
After outlining the leaf’s blade add a slightly curved petiole running from it to the stem.
If you wish to see what the entire leaf (including the part of it that is hidden behind the grapes) looks you can see it near the end of step eight.
Step 6 – Outline the Teeth Along the Edges of the Leaf
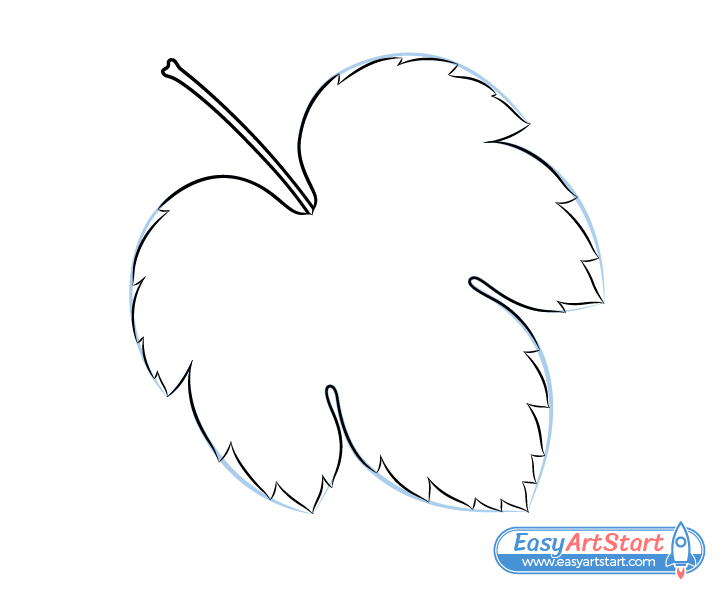
Use the outline from the previous step as a guide and draw the “teeth” inside it running along the leaf’s edge. You can see an example of how to do it above. However if you are drawing the leaf along with the grape bunch part of this will obviously be hidden behind it.
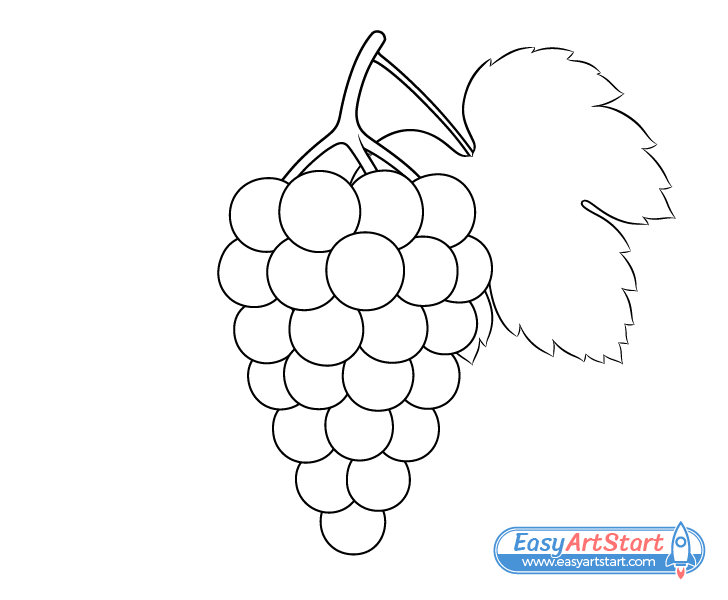
Make the lines that define the “teeth” darker than the outline but don’t press on the pencil too hard as you may still need to make revisions/corrections. You can then erase the bits of the outline in between the “teeth” once you have them draw out. If you just have a regular eraser you can use it’s corner for more precision when doing this.
Step 7 – Draw the Large Leaf Veins
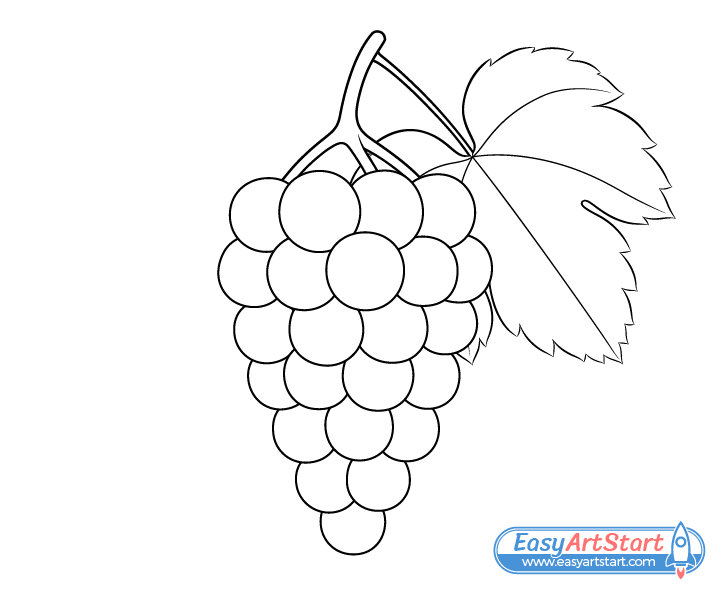
Going from the base of the leaf towards the main tips of it’s different sections draw the large veins. Make the one down the middle (called the midrib) just very slightly curved and the other ones much more so.
Step 8 – Draw the Small Leaf Veins
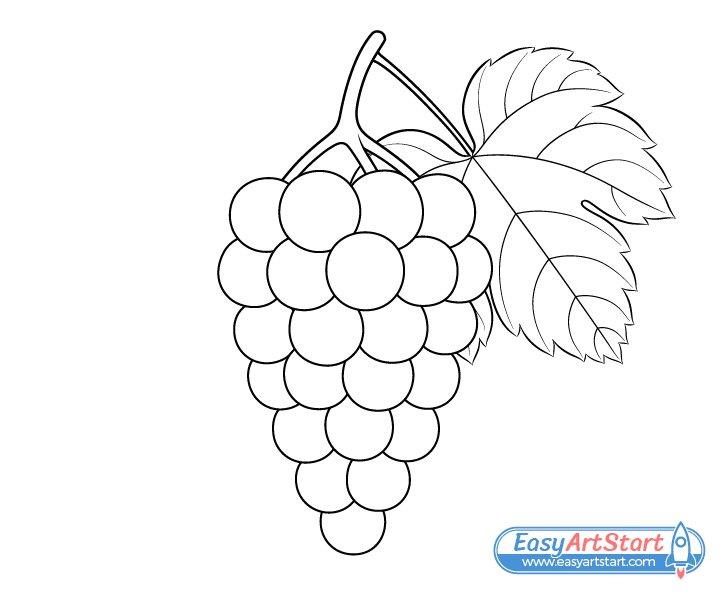
Finally, running out from the large veins towards the “teeth” along the edges draw the smaller veins. Again make each one curved and place them as shown in the examples above and below.
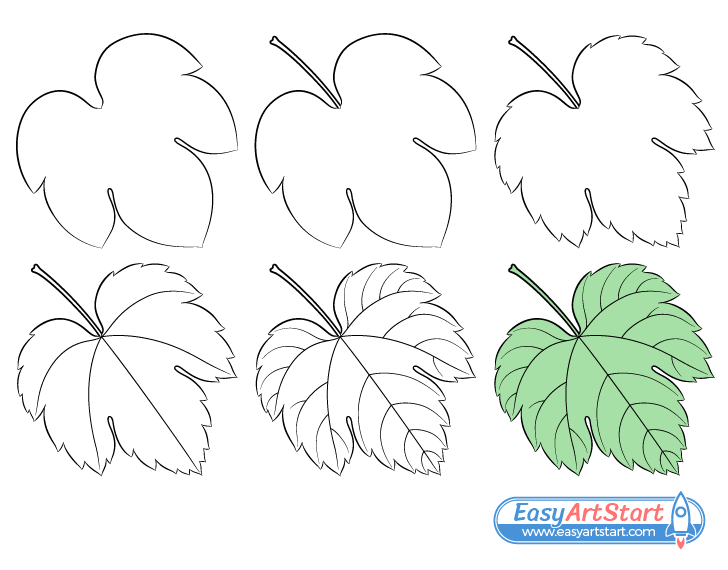
You can see a step by step drawing of the entire grape leaf in the example above.
For drawing another kind of leaf similar to this one see:
How to Draw a Maple Leaf Step by Step
For drawing a more generic looking leaf check:
How to Draw a Leaf Step by Step
Once you’ve added all of the leaf’s details trace over your drawing with darker pencil lines or a thin black marker but be sure that you are happy with how everything looks before doing so.
Step 9 – Color the Grapes
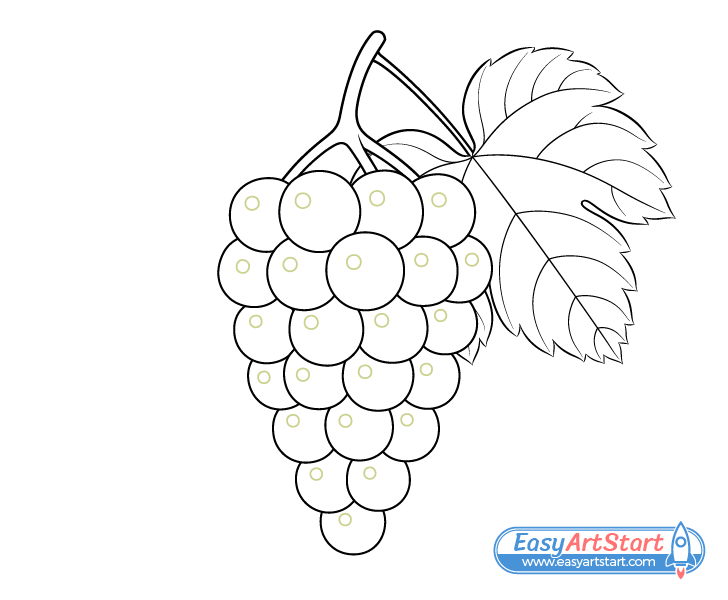
Before you begin coloring lightly outline a little white reflection inside each of the grapes as shown in the example. You can either do this using a regular pencil or whatever color you choose for the grapes (use green if you choose yellow/green as in the example). Try and place all of the reflections towards the same side of each grape (where possible).
Adding the white spots will help show that the grapes have a smooth surface.
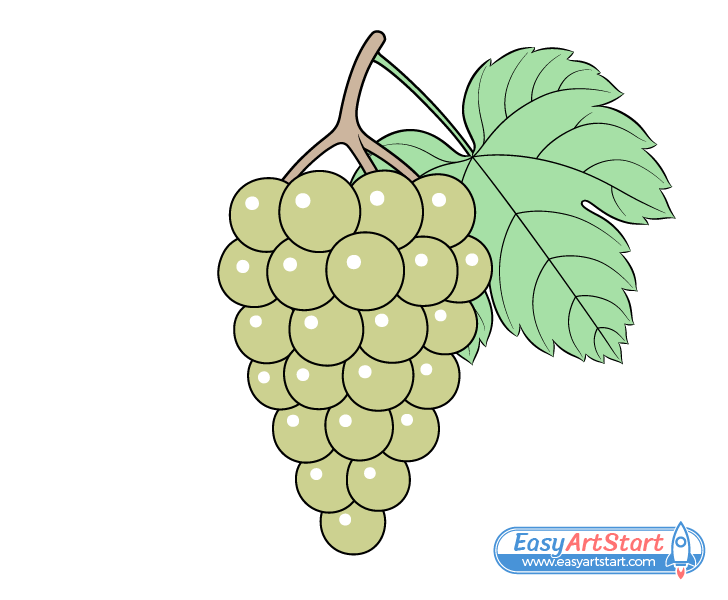
As already mentioned, if you wish to make the grapes the same color as in the example use a yellow green. You can create this either by mixing the appropriate paints or applying the two in layers with colored pencils.
Adding the yellow to the green will give the grapes a ripe look. Alternatively you can make the grapes a dark blue, purple or a purple/red (for red grapes).
After coloring the grapes make the stem brown and the leaf green to finish the drawing.
Conclusion
This tutorial shows how to draw a nice looking bunch of grapes with the option of also adding a grape leaf. As you can see from this guide, even art that uses a somewhat simplified style can look great when done right.
Both the grape bunch and the leaf have very characteristic shapes that are easily recognizable. By using the right color you can also show that the grapes are ripe and by adding the little details of the reflections you can help convey the the smoothness of their surface.
Hopefully you’ve found this guide and the simple but effective drawing tips it proves helpful. For more such tutorials also be sure to try:

