How to Draw a Mushroom (6 Easy Steps)
This tutorial shows an easy way to draw a mushroom. It provides step by step illustrated examples and simple instructions.
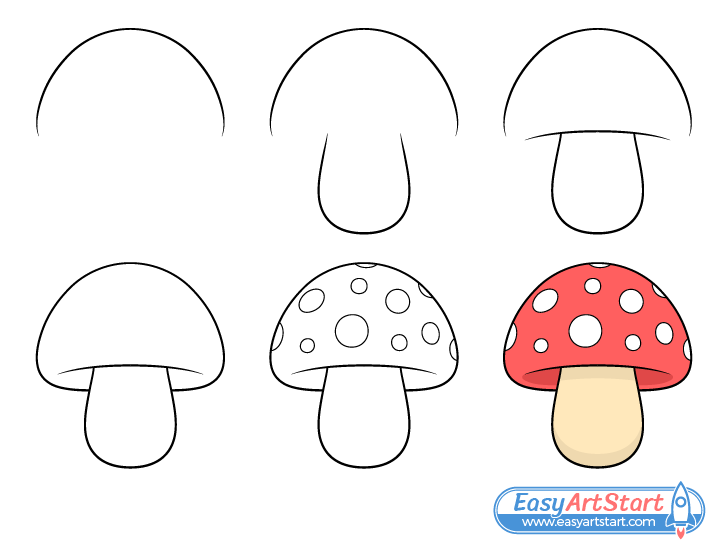
As shown in the preview image above, the tutorial goes from a fairly simple line drawing to applying some basic color/shading. The mushroom is drawn in a style that can fit well into a cartoon, a comic book or a video game.
Although the drawing steps are done in a way where in an ideal situation you won’t need to do any erasing, you should still start the tutorial in pencil and make light lines just in case you make a mistake. Darken them once you have all parts of the mushroom outline by tracing over them.
Step 1 – Draw the Top of the Mushroom Cap

Begin by drawing the upper part of the mushroom’s cap. Make it fairly curved as shown in the example.
Step 2 – Draw the Stem
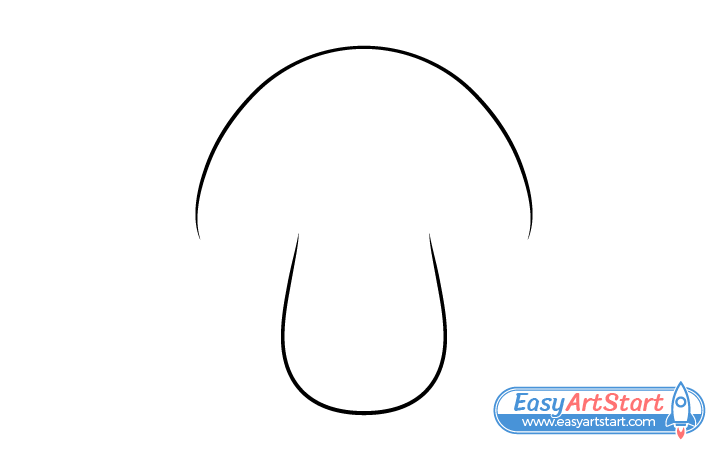
Below the cap add the stem shaped a bit like the letter “U”.
Step 3 – Draw the Bottom of the Cap

Define the forward facing bottom end of the cap with a lightly curved line. Draw it in a way where it does not touch the sides.
Leaving gaps on the sides will help show the cap’s thickness. If you draw the line all the way to the edges it will appear paper thin.
For another example of drawing in such a way see:
How to Draw a Glass of Water (6 Steps)
Step 4 – Draw the Background Part of the Cap

Draw the bottom/background part of the cap going behind the stem as shown above.
Step 5 – Draw the Spots
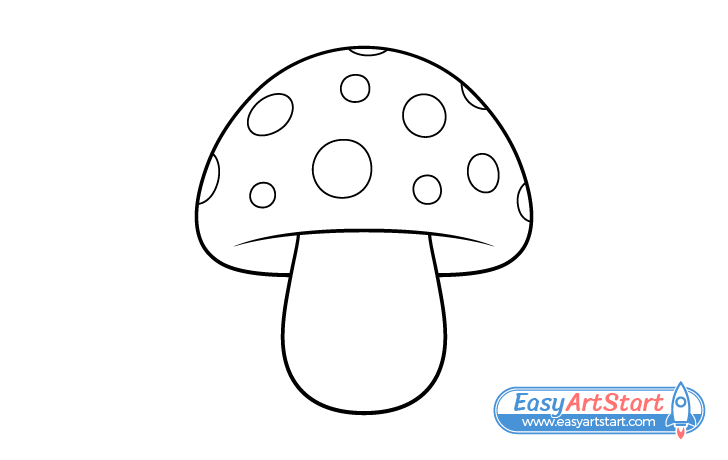
For the last set of details add the spots along the mushroom’s cap. You can make these somewhat random in size. To show the curvature of the cap draw the spots in the middle closer to circles and and make the ones near the edges more oval.
For another tutorial that shows a similar approach see:
How to Draw a Strawberry Step by Step
Alternatively, you can leave the spots out all together and have a different type of mushroom without them.
Step 6 – Color the Mushroom
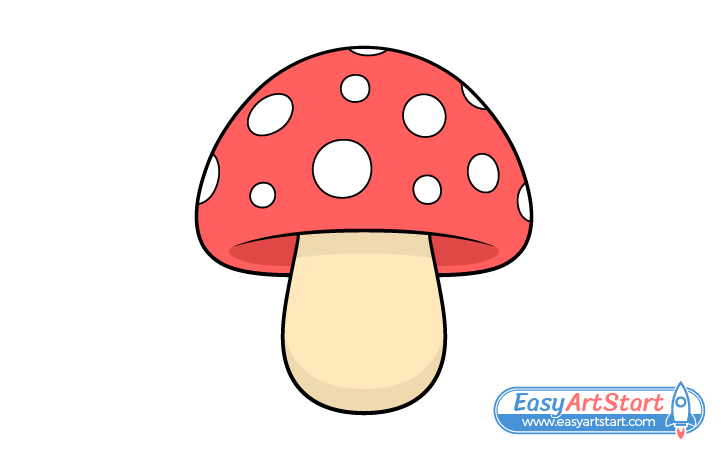
To color the mushroom make the cap red and the stem a light yellow brown. You can also make the cap a different color if you prefer (especially if you chose not to add the spots).
After applying color add some shading. Darken the bottom/inner part of the mushroom cap as shown in the example. (right below the curve drawn in step four). Also, darken the upper part and bottom end of the stem. The upper end will have a shadow cast on it by the cap while the lower part will have a shadow cast by the stem on itself.
An easy way to color the drawing is with ether paints or colored pencils. You can just use a regular pencil to add the shadows afterwards.
Conclusion
Drawing a mushroom in the simplified style shown in this tutorial if fairly easy. By creating the line drawing in the right way and by adding some basic color and shading you can get artwork that both looks good and is not too difficult to create.
If you like these kinds of easy to follow step by step guides also be sure to try the following:

