How to Draw a Muffin Step by Step
This tutorial shows how to draw a muffin with chocolate chips using easy to follow step by step examples done in a simplified style.
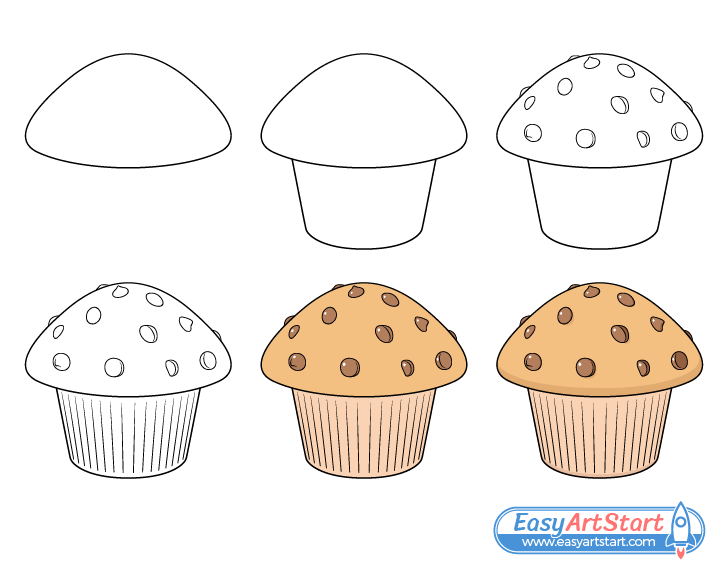
The focus of this guide is on helping make artwork that is simple but also looks good. First, it shows how to creating a line drawing that gives the muffin it’s characteristic shape a more three dimensional appearance. I then gives examples of how to apply color and shading in a way as to further emphasize these.
While the drawing stages are set up in a way where ideally you don’t need to do any erasing it’s still recommended that you start the tutorial in pencil just in case you make a mistake. Also, make light lines until you have all parts of the muffin outlined (darken them later on). The lines in the examples have been made dark just so that they are easier for you to see.
For drawing a chocolate chip cookie have a look at the following tutorial:
How to Draw a Cookie Step by Step
Step 1 – Draw the Top Part of the Muffin
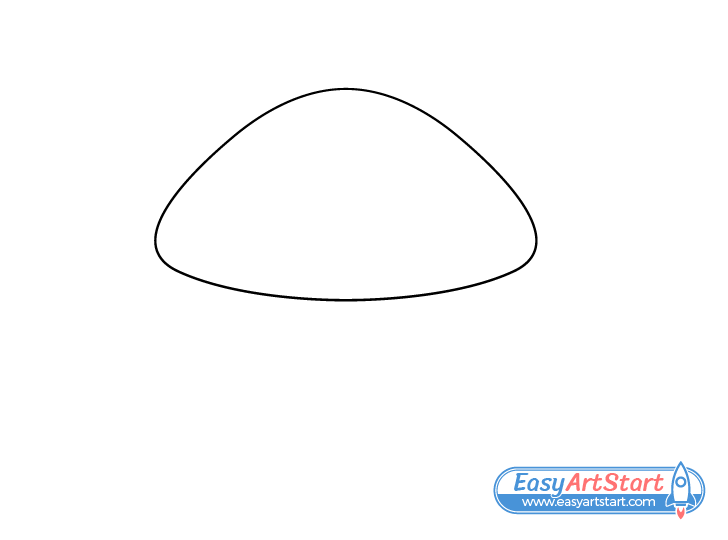
Draw the top part of the muffin shaped pretty much like a mushroom cap. First, draw it’s sides and top followed by the bottom curve.
Step 2 – Draw the Bottom
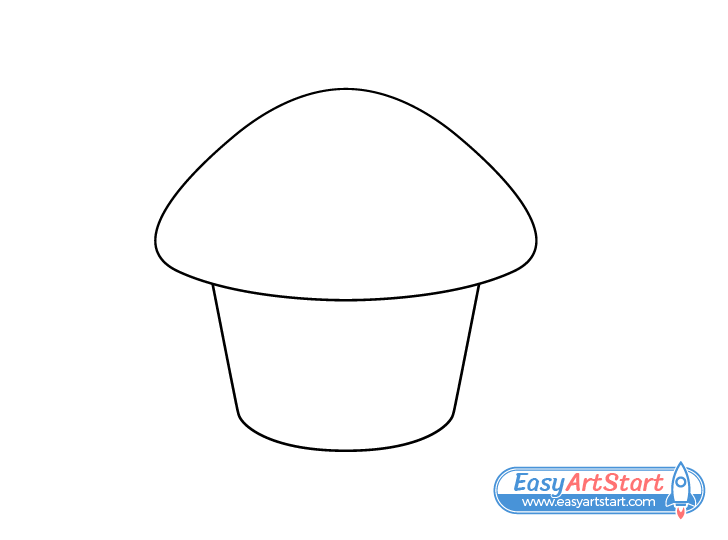
Draw the lower part of the muffin shaped somewhat like a bucket with it’s upper end hidden by the cap. Make this section narrower as it goes down by first defining it’s sides. Next, join them with the curve of the bottom.
It’s important to note that you should make the bottom of the muffin’s lower section a little more curved than that of the top.
Step 3 – Draw the Chocolate Chips
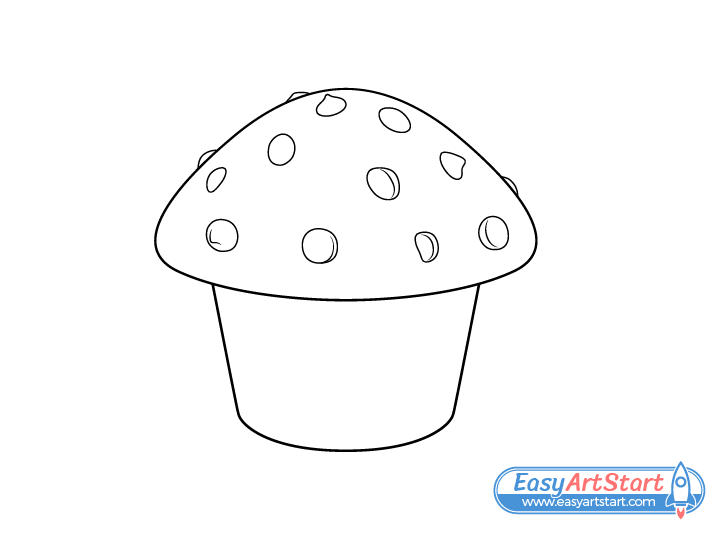
Sticking out of the “cap” add some chocolate chips.
It’s important to note that you want to draw the chips pointing in different directions. Draw some sticking out sideways, some with their upper tips, others with their bottom ends (as shown in the example).
Some chips are also more embedded in the muffin while others are more along it’s surface. You can show this by making their shapes smaller or large accordingly.
Step 4 – Draw the Paper Folds
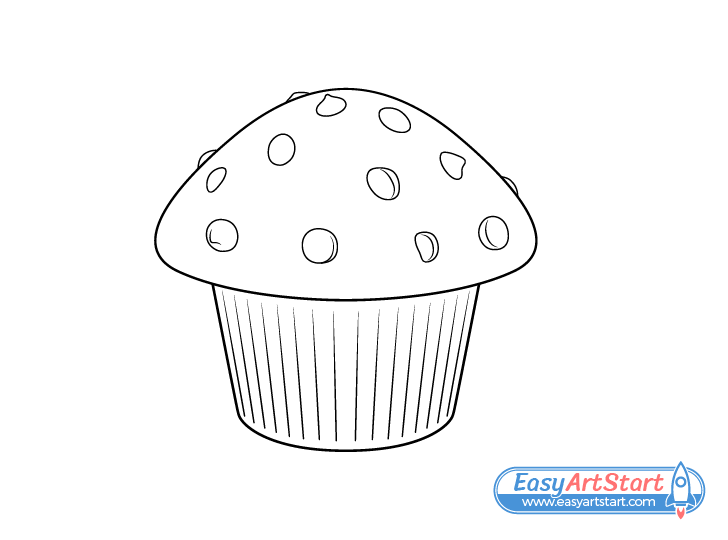
For the last part of the line drawing add the folds in the paper that covers the bottom of the muffin. Draw these farther apart towards the middle and closer together the more they move to the sides. Also draw each fold leaning more towards it’s respective side the closer it is to it.
Drawing the folds in such a way will help show the curvature of the muffin’s bottom shape and give the drawing a more 3d look.
Once done adding the folds darken your lines with the pencil or trace over them with a thin black marker. Just be sure that you like how things look before doing so.
Step 5 – Add Color
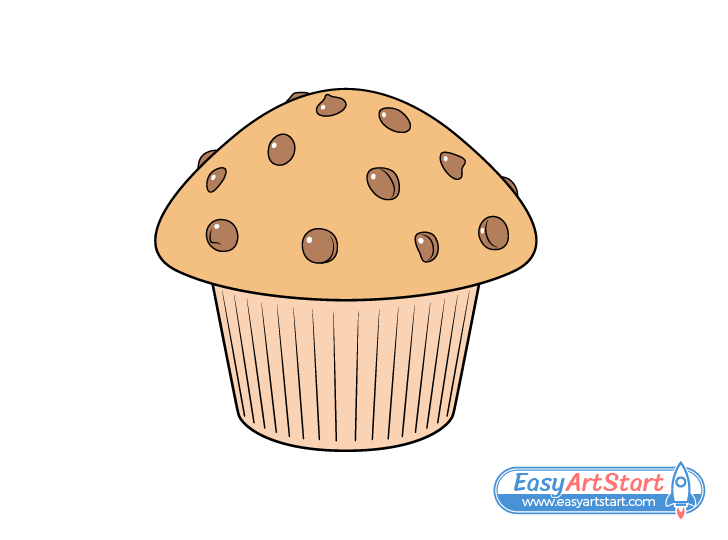
To color the muffin transparent water based paints or colored pencils can both be good options.
Make it’s top an orange/brown and it’s bottom a lighter version of the same color (to show that it’s wrapped in white paper). Either mix the right color paints or apply the orange/brown in layers using pencils (to blend the two colors). To create the lighter color either water down the paints more or don’t press as hard on the pencils.
Make the chocolate chips brown but leave a little white reflection inside each of them. The reflections will help look like the chocolate is slightly melted.
Step 6 – Add Shading
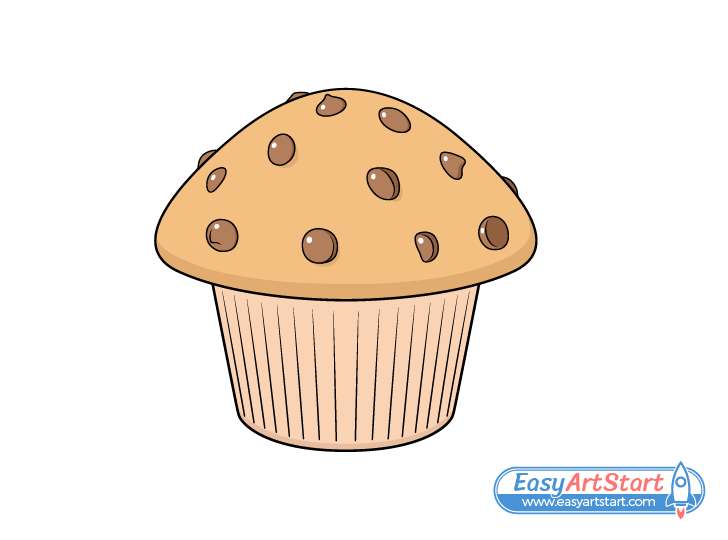
Finally, add a bit of shading to make the muffin stand out more.
In this case the drawing is done as though the light is coming from above the muffin and very slightly to it’s left. Show this by first adding a fairly large shadow running along the bottom of the upper section. Next, add a much thinner shadow along the bottom of the lower one.
Add some shadows along the upper right sides of the chips. Fully shade any sides that are facing completely away form the light (on chips that have a visible edge). Also, show a few of the chips that are sticking out more casting small shadows to their lower right (opposite the light).
Overall you don’t need to be overly precise with the shading. As the drawing is simplified the goal is to just make it reasonably believable.
Conclusion
This tutorial shows how to create a nice and simple drawing of a muffin but also one that is not overly stylized. By putting together a line drawing that emphasizes an object shape you can give it a more 3d look even before shading. However, applying a bit of color and shading (as was done in this example) can help make artwork stand out even more.
If you like these kinds of tutorials with helpful tips and easy to follow examples, be sure to also try the following:

