How to Draw a Maple Leaf Step by Step
This tutorial shows how to draw a maple leaf with detailed examples that offer a comprehensive breakdown of it’s different parts.
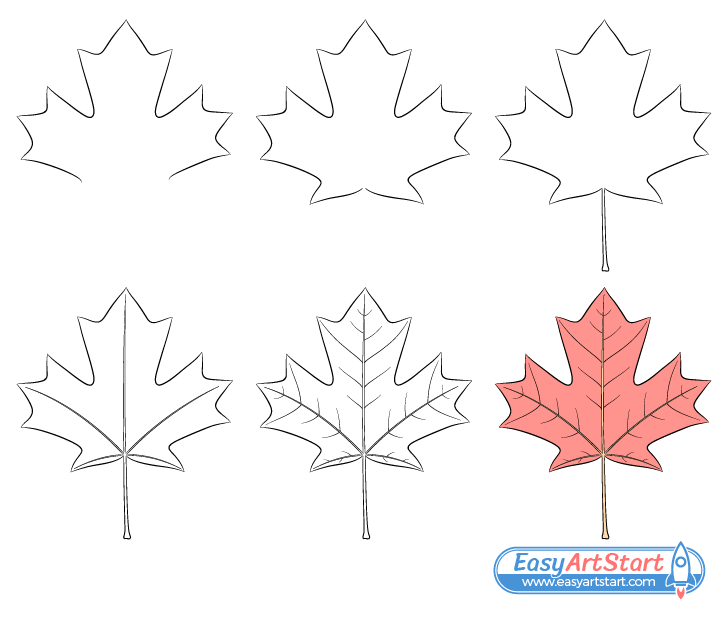
A maple leaf has a very distinct and somewhat complex shape. This makes it interesting but also a bit challenging to draw. To help this tutorial breaks the drawing process down into logical and easy to follow stages. The focus is on first creating an outline of the blade to get the leaf’s characteristic shape and then on adding the smaller details such as the veins.
Although the guide is set up in a way where ideally you don’t have to do any erasing, you should still start the drawing in pencil and make light lines. This way they won’t leave marks in case you ever have to make a correction. You can darken your lines once you have the entire leaf outlined.
For drawing a regular leaf see:
How to Draw a Leaf Step by Step
Step 1 – Draw the Upper Part of the Maple Leaf
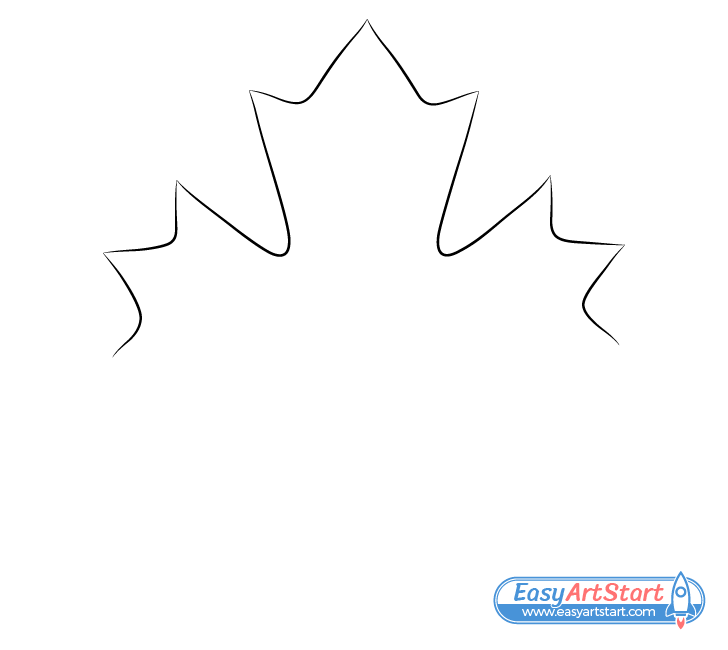
Getting the correct shape of the leaf’s blade is the most important part of the drawing process. To make this easier the leaf in the example is shown in a vertical position (drawing things on an angle can be more challenging).
Start by outlining the blade’s middle section. Make it wider as it goes up with a split into three near the end. Next, add the two sections to it’s sides. Draw each one pointing towards it’s respective side and also slightly upwards. Make them smaller than the middle section but otherwise fairly similar in shape.
Overall you want the leaf to be fairly symmetrical but not too much so as you also want it to look organic.
Step 2 – Draw the Bottom of the Blade
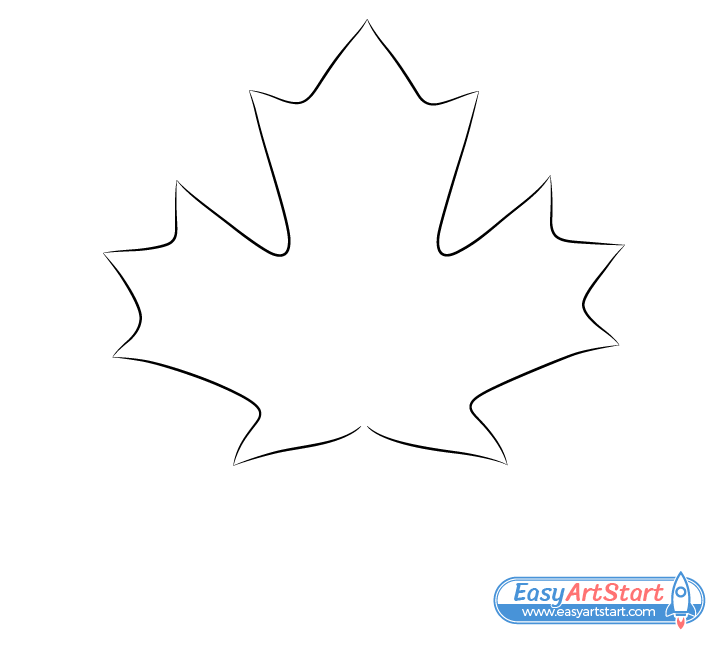
Add the two lower sections of the blade to finish it’s outline. Unlike the upper ones make these narrower as they they go out without any splits. Draw each one with a bit of a downwards curve ending in a pointy tip.
Step 3 – Draw the Petiole
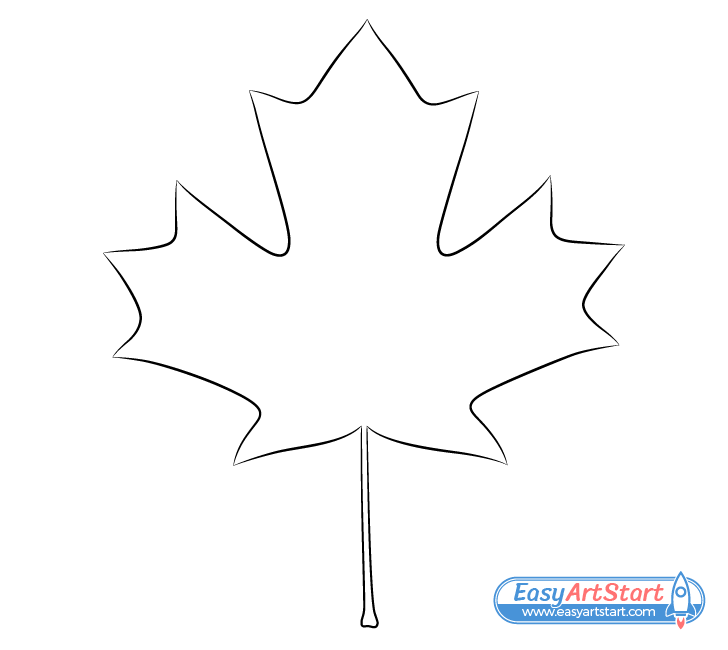
Going out from the bottom/middle of the blade draw the petiole (the part that attaches the leaf to the branch). Make this wider as it goes down with an even wider bit on the very end.
Step 4 – Draw the Large Veins
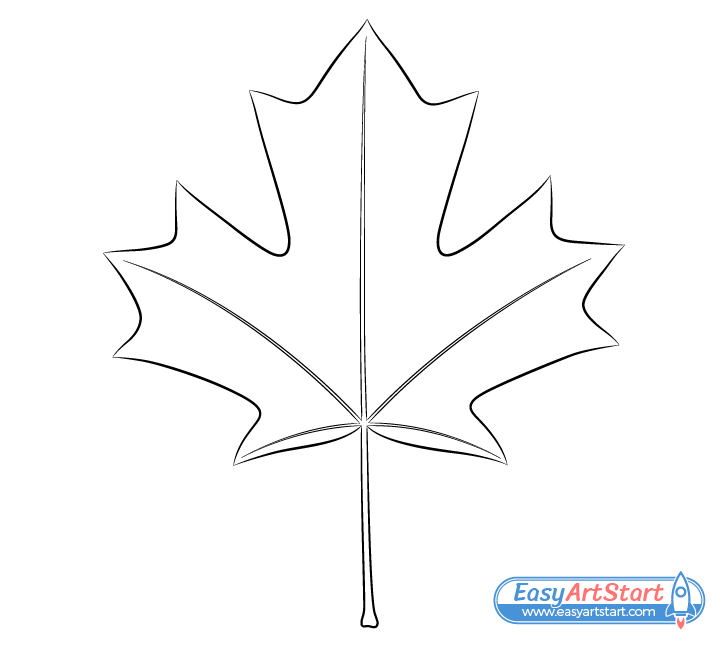
Draw the larger veins running from the top of the petiole towards the tip of each of the leaf’s five sections. Start with the largest one in the middle called the midrib and then add the rest. Make the veins wider at their base and narrower as they go out. To do this simply define each one with a pair of curved lines that get closer together and eventually join together at their ends.
Step 5 – Draw the Small Veins
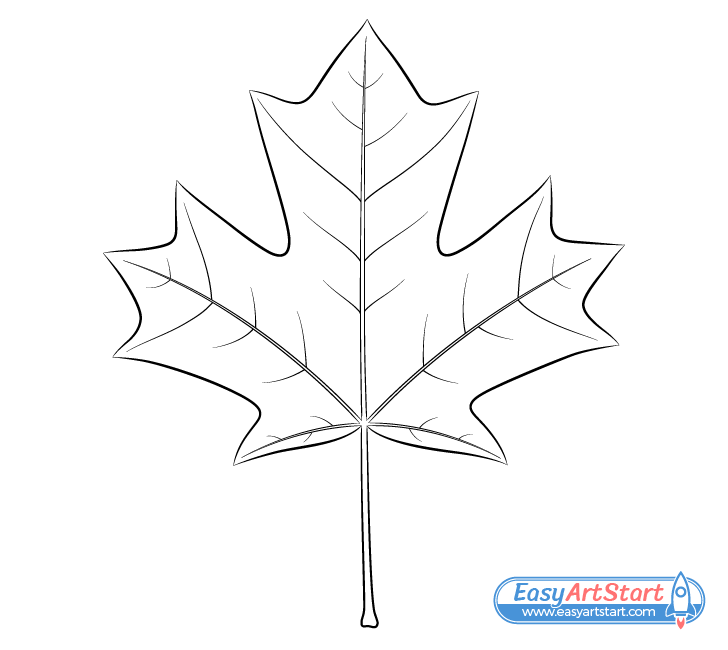
Going out from the large veins draw some smaller ones. You can define each of these with just a single line. Start by adding the longer ones that go towards the tips of the splits on the sides of the tree upper sections. Next, draw the rest of the small veins with somewhat random placement. Often these will have a corresponding vein on the other end of the large one that they grow out of but not always. Keep this in mind when drawing.
Once you’ve added the last parts of the leaf you can darken your lines by tracing over them with the pencil or a thin black marker.
Step 6 – Color the Maple Leaf
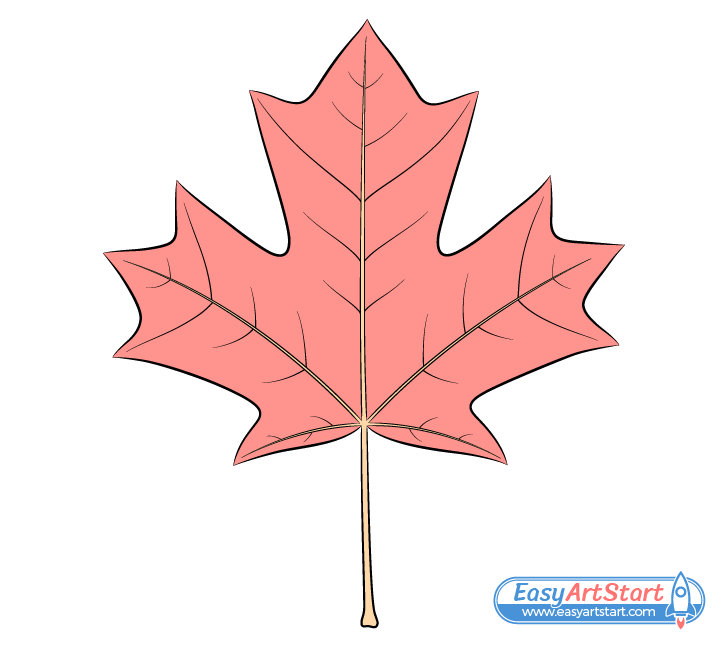
The maple leaf in this example is red like you might see one in the fall. You can also make it orange, yellow or brown. For a spring/summer leaf color it green.
For a fall leaf make the petiole and veins orange and for as spring/summer one make them a light yellow-green.
You can use whatever medium you like or have around to add the colors (paints, markers, colored pencils, etc…).
For drawing an entire tree in a simple style see:
How to Draw a Tree (Simple 6 Step Guide)
Conclusion
Due to a maple leaf’s somewhat unusual shape drawing one can be tricky. To help this tutorial shows an organized and logical way of doing it.
Establishing the leaf’s overall shape and adding it’s larger parts can make it much easier to see where you should place the smaller details.
If for example you were to start the drawing with the small vein’s without having the large ones as guides positioning them could be pretty confusing.
For more similar drawing guides with helpful tips and and easy to follow examples also try:


