How to Draw a Cookie Step by Step
This tutorial shows how to draw a chocolate chip cookie in six steps. It provides examples of line drawing, coloring and shading.
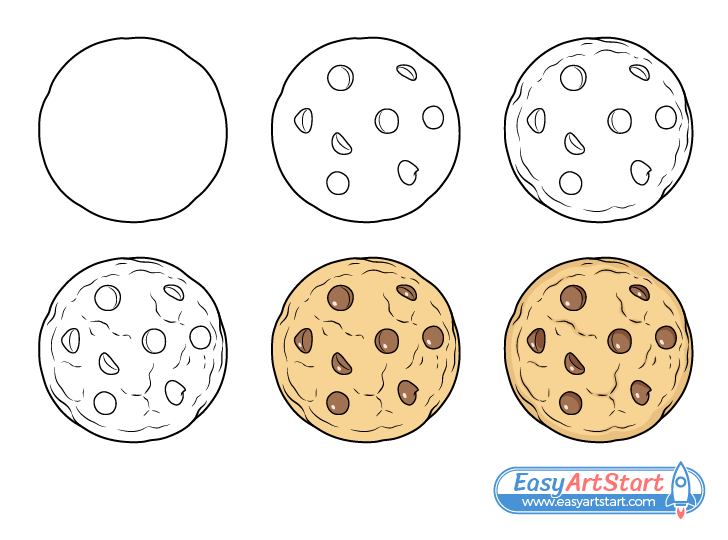
The cookie in the example is slightly stylized to make it easier to draw. At the same time it’s not overly simplified and has a good amount of detail.
Due to the cookie’s uneven shape you don’t have to be very precise with your lines wen drawing it. You actually want them to be somewhat wobbly. However, you should still start the drawing in pencil just so you have the option to erase things if needed. Also, try and make fairly light lines until you have all parts of the cookie.
For drawing other baked goods see:
Step 1 – Outline the Cookie’s Shape
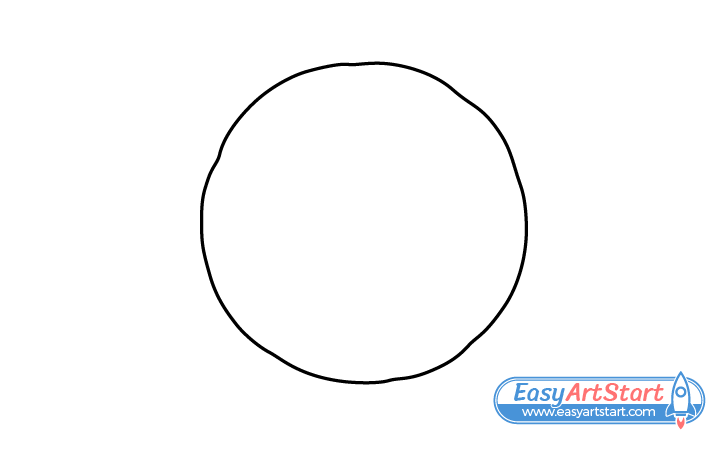
Start by outlining the main shape of the cookie. It should be somewhat circular but not too much so. Cookie dough tends to warp when it’s baked so you want the outline to be slightly wavy and uneven.
Step 2 – Draw the Chocolate Chips
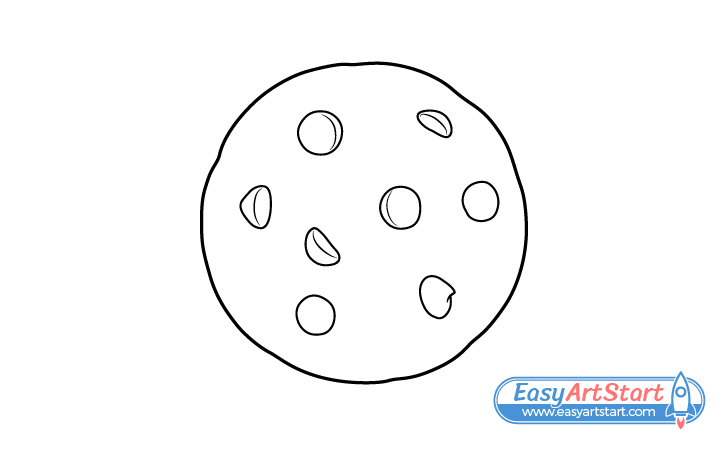
Inside the cookie’s outline draw the chocolate chips. One important thing to keep in mind here is that they will be facing in different directions when mixed with the dough. A common mistake beginners often make it drawing all the chips to be practically the same (just round for example).
Show the chips facing in different directions by changing the shapes of their outlines and the position of their edges. For example, to show a chip that is embedded in the dough sideways draw it more like a half circle while for one that is facing upwards or downwards draw it more like full circle. Draw the edge closer to the middle for chips that are facing more sideways and closer to the edge for the ones that re facing more downwards. Don’t draw the edge at all for chips that are facing upwards or directly downwards.
Step 3 – Draw the Dough Folds
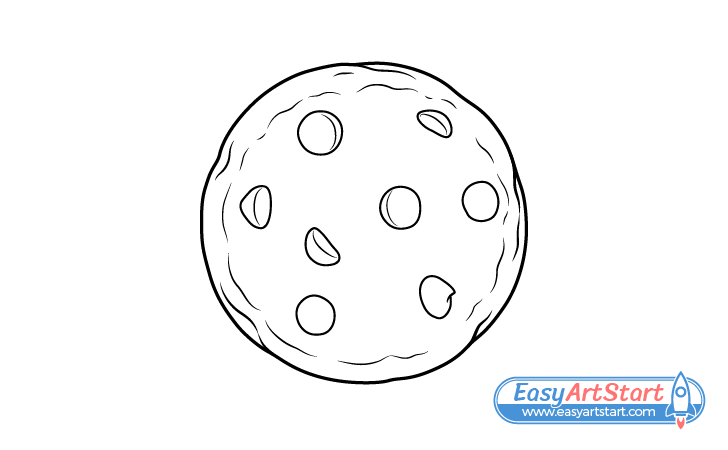
When a cookie is baked the melting dough will tend to form folds. Show these with wavy broken up curves around it’s edges.
Step 4 – Draw the Cracks
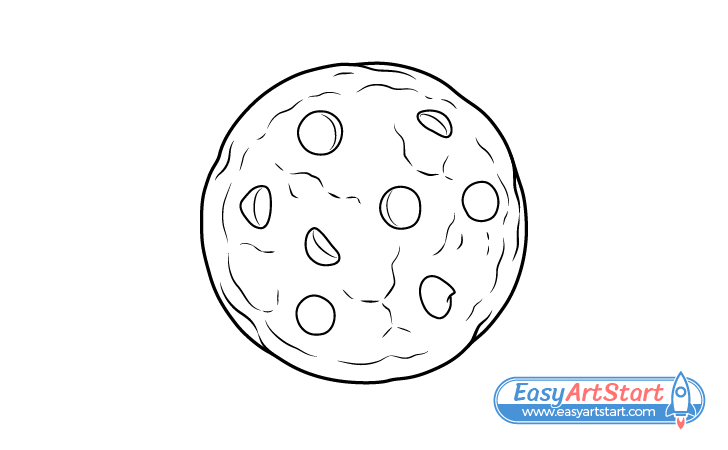
Finally, the cookie will also tend to crack as it bakes. Show the cracks going in different directions with broken up lines like in the example.
Once you’ve added the last set of details trace over your drawing with darken pencil lines or a thin black marker.
You can (optionally) make the outline around the cookie and the chocolate chips thicker and the lines that define the cracks and fold thinner (for the most part). You want to show some deeper/wider cracks in a few places by making the lines that define them slightly thicker as well as well.
Step 5 – Color the Cookie
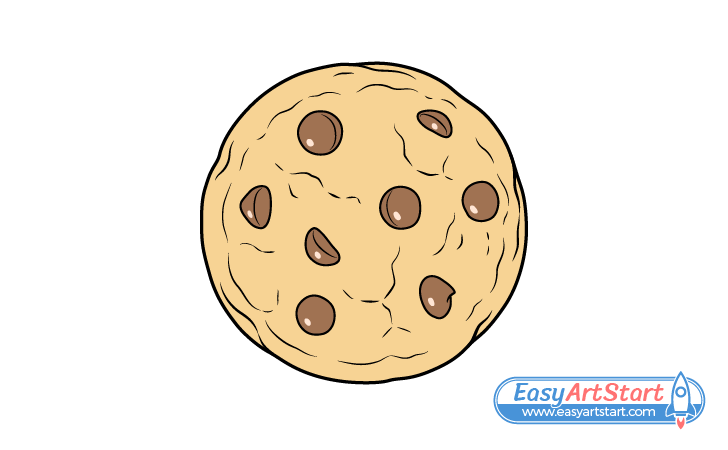
To color the drawing make the cookie itself an orange/yellow/brown and the chips a fairly dark brown.
To create the color for the cookie you can either mix the appropriate color paints or apply the orange/yellow/brown over top of one another with a colored pencils.
When coloring the chips also leave a little white spot inside each of them and lightly go over it with brown afterwards. This will make the chocolate look smooth like it’s melted (as it often is on a freshly baked cookie).
Step 6 – Add Shading
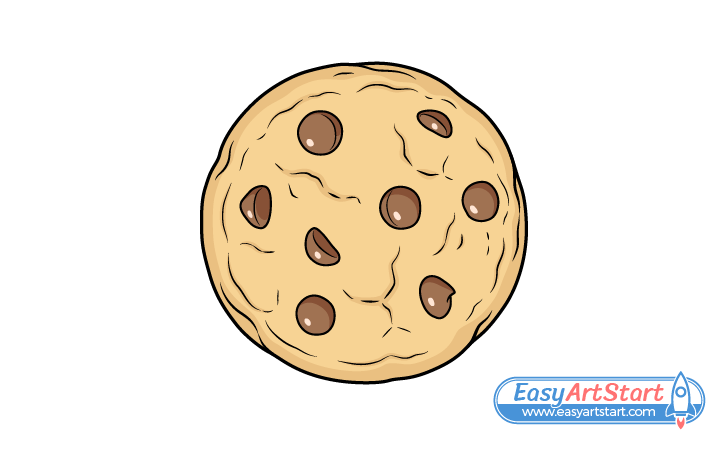
For the last step add some very simple shading to make the cookie appear a little less flat. Do this by first creating a darker area along it’s edge. Next, add some shadows along the larger/deeper cracks and folds. Finally, add shadows along the upper right sides of the chocolate chips (as though the light is coming form their bottom left). These will help give the chips a more three dimensional look.
Conclusion
This tutorial shows how to draw a slightly stylized chocolate chip cookie. By adding the right amount of detail as well as some basic shading you can create artwork that is not too complicated but also looks good.
If the example cookie made you hungry for one that’s a good indication that the drawing is convincing.
For more similar guides also be sure to try the following:


