How to Draw Cherries in Six Steps
This tutorial shows an easy way to draw cherries with their stems and leaves. It provides step by step examples and instructions.
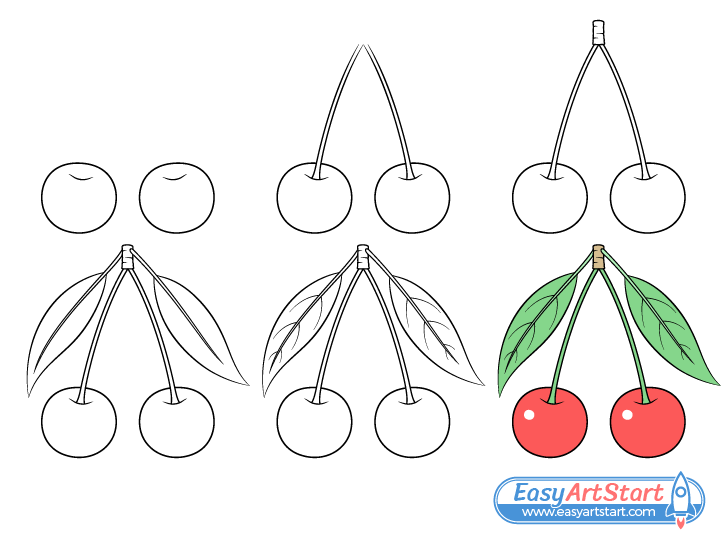
The cherries shown as the example are drawn in a somewhat simplified way but are still fairly detailed. As such, this guide can be great if you want to draw something that is not too complicated but at the same time not overly plain. It can be particularly useful if you are beginner looking for a straightforward guide to help work on your art skills. The guide can also be good if you just want to draw something easy because you’re bored.
You should start the tutorial in pencil and make light lines as you will need to erase small parts of the drawing in some of the steps. You can darken your lines once you have all parts of the cherries outlined.
Step 1 – Outline the Cherries
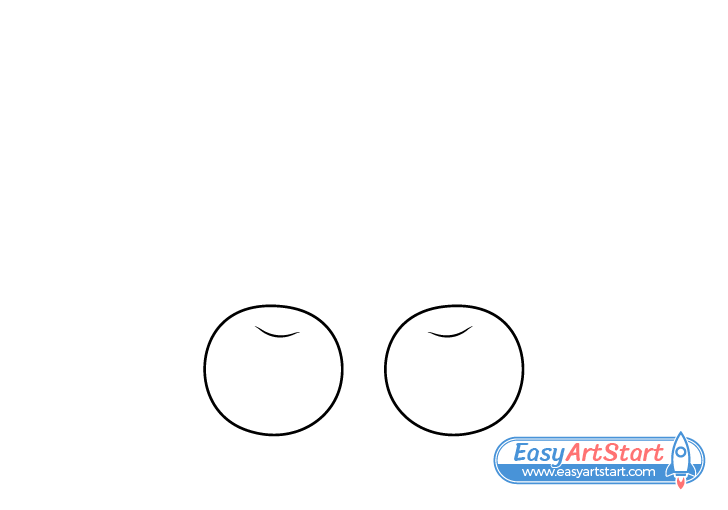
Begin by outlining the cherries as shown in the example. Draw them slightly tilted towards one another and make each one oval in shape. After drawing their main outlines add the areas that the stem grows out of with a pair of small curves towards the upper end of each cherry.
Step 2 – Draw the Stems
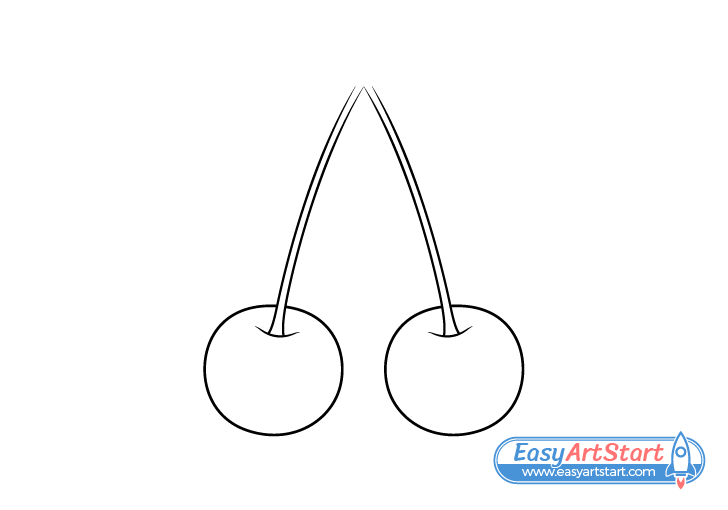
Going up from each cherry draw a pair of stems that lightly curve towards each other until they come together. You will need to erase a bit of each cherries outline when adding these. You just need to make a pair of little gaps so use the corner of the eraser.
Make each stems a little thicker at the base (near the cherry) but of fairly even thickness throughout the rest of it’s length.
Step 3 – Connect the Stems at the Top
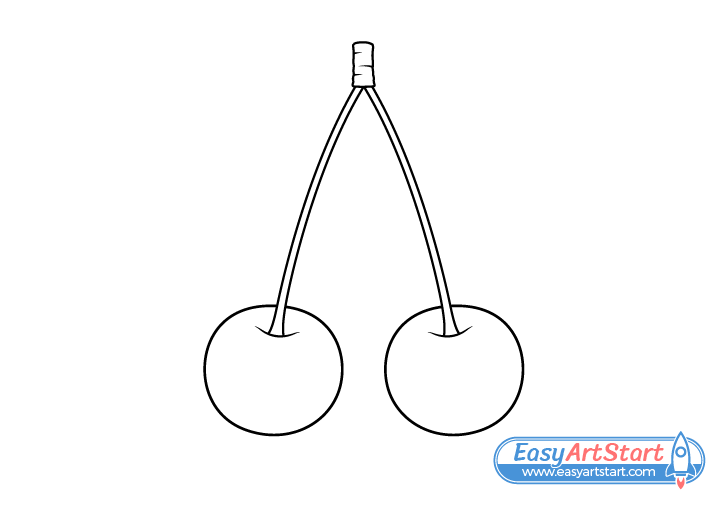
Draw the little bit at the top that joins the stems together and connects the cherries to the branch.
Step 4 – Draw the Cherry Leaves
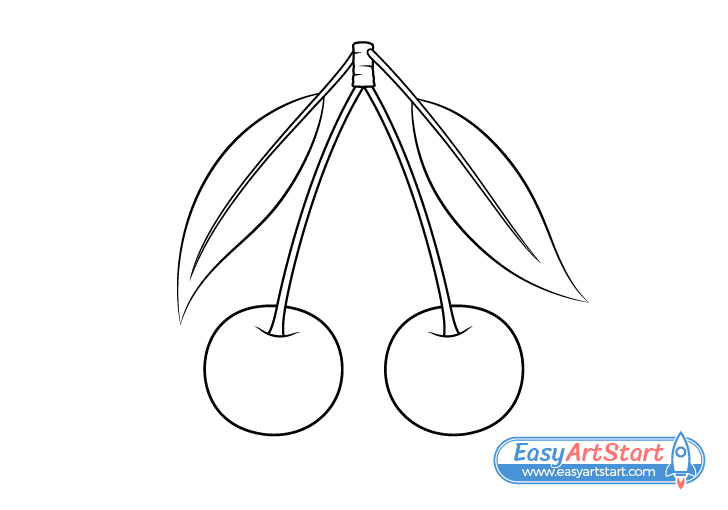
Add a pair of leaves growing from the same part as the stems. Please note that the leaf on the right is positioned slightly in front of the cherries and will therefore overlap the part drawn in the previous step. You can erase bit of it’s outline when adding this leaf’s stalk/petiole. The leaf on the left is in the back so the base of it’s petiole is hidden (no need to do any erasing).
Draw the leaves starting with the outlines of their blades. In this example they are being viewed on an angle so you will want to make each one slightly narrower than if it was facing directly towards the viewer. Also, draw each blade to be slightly curved and give them pointy tips. Next, add the stems followed by the midribs.
A midrib is the large vein that runs through a leaf’s middle.
Step 5 – Draw Veins Along the Leaves
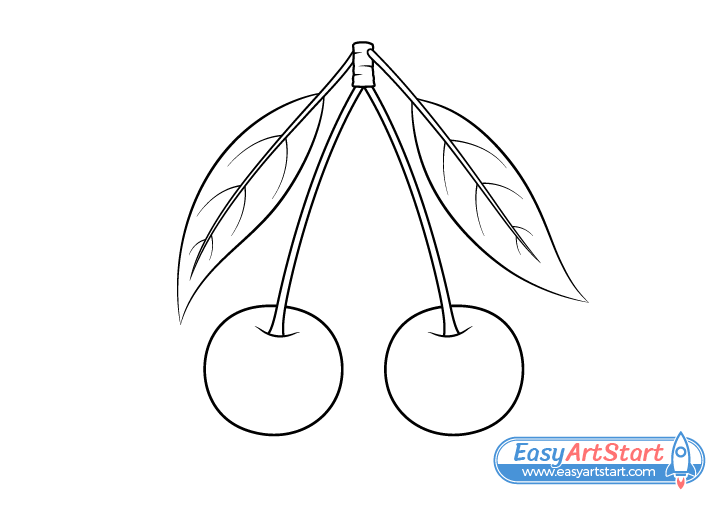
Going out from the midribs add some smaller veins. Show these as several curves that get shorter the closer they are to the tip of the blade.
For a more in depth tutorials on drawing leaves see:
Step 6 – Color the Cherries Drawing
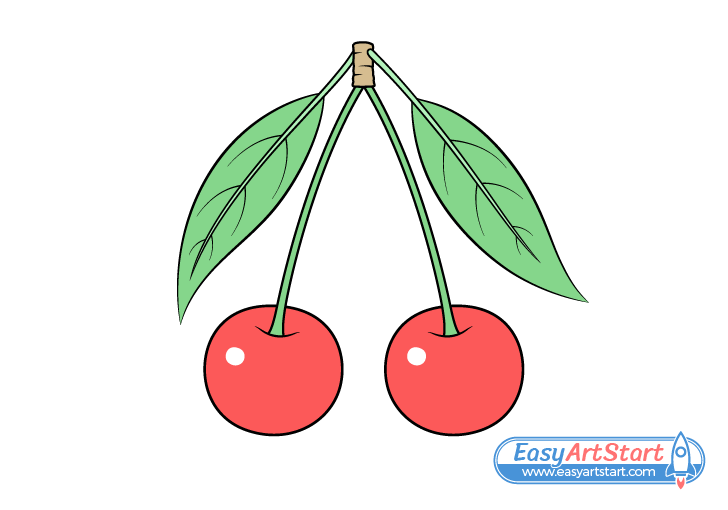
To color the drawing markers or colored pencils can both be good options.
Make the cherries red and the leaves and stems green (you can make the petioles/midribs a slightly lighter green). Make the little bit that the stems/leaves grow out of brown.
When coloring the cherries leave a little white reflection to one side of each of them. This will help show that they have a smooth surface.
For more examples of adding reflections to create a shiny looking surface see:
Conclusion
This tutorial shows an easy way to draw a pair of cherries. The examples are done in a slightly simplified style to make it easy to follow along. However, the resulting artwork is still very nice and not overly plain. Drawing in such a way can be easy, fun and helpful in getting started as a beginner artist.
For more similar guides also be sure to look at the following:

